Guide
To get started with this library first create a new project and create a virtual environment & activate it (optional but recommended). Once you’ve done that you may continue.
Installation
Install game_state through pip in your terminal-
(.venv) $ pip install game_state
Since game_state does not have any dependancies, we need to manually
install the pygame library (or pygame-ce if you’re using that).
(.venv) $ pip install pygame-ce
Using the Library
Note
This library has been updated to version 2.0, introducing breaking changes that are not backward compatible with version 1.x.
If you are using a version older than 2.0.0, refer to the v1 documentation for guidance: game-state v1.1.3 Documentation
We highly recommend upgrading to version 2.0, as it offers significant optimizations and improvements over v1.
Let’s create a simple pygame script having two screens. One screen will display green colour and the other will display blue with a moveable red square.
Setting up the basics
import pygame

from game_state import State, StateManager


pygame.init()
pygame.display.init()
pygame.display.set_caption("Game State Example")

speed = 200  # Player speed
BLUE = (0, 255, 0)
GREEN = (0, 0, 255)
Now that we have imported and set the display of our app, let’s create a main menu screen.
Creating a simple screen
class MainMenuState(State, state_name="MainMenu"):
   def process_event(self, event: pygame.event.Event) -> None:
      # This is executed in our our game loop for every event.

      if event.type == pygame.QUIT:
            # We set the state manager's is_running variable to false
            # which stops the game loop from continuing.
            self.manager.is_running = False

   def process_update(self, dt: float) -> None:
      # This is executed in our game loop.

      self.window.fill(GREEN)
      pygame.display.update()
Note
In this library screens are referred to as States and screen manager as
StateManager
Now that we have created a screen, let’s add it to our screen manager and run it!
Adding our screen to the state manager.
def main() -> None:
   screen = pygame.display.set_mode((500, 600))
   # Create a basic 500x600 pixel window

   state_manager = StateManager(screen)
   state_manager.load_states(MainMenuState)
   # We pass in all the screens that we want to use in our game / app.

   state_manager.change_state("MainMenu")
   # We need to use the name we supplied in the __init_sublcass__'s `state_name`.
   # If no state_name was passed, we use the class name itself.

   clock = pygame.time.Clock()

   while state_manager.is_running:
      # The state manager has a `is_running` attribute which is `True` by default

      dt = clock.tick(60) / 1000  # The delta time from the clock for frame rate independance.

      for event in pygame.event.get():
            state_manager.current_state.process_event(event)
            # Calling the event function of the running state.

      state_manager.current_state.process_update(dt)
      # Calling the update function of the running state.

if __name__ == "__main__":
   main()
There you have it! We have set up a simple screen using the Game State library.
Adding more screens is just as simple as the subclassing State & adding it
to the StateManager.
Adding the main game screen to our state manager.
class MainMenuState(State, state_name="MainMenu"):
    def process_event(self, event: pygame.event.Event) -> None:
        # This is executed in our our game loop for every event.

        if event.type == pygame.QUIT:
            # We set the state manager's is_running variable to false
            # which stops the game loop from continuing.
            self.manager.is_running = False

        if event.type == pygame.KEYDOWN and event.key == pygame.K_w:
            # Check if we're clicking the " w " button.
            # If the condition is met, we change our screen to the
            # "Game" screen from the manager.

            self.manager.change_state("Game")

    def process_update(self, *args: float) -> None:
        # This is executed in our game loop.

        self.window.fill(GREEN)
        pygame.display.update()


class GameState(State, state_name="Game"):
    def __init__(self) -> None:
        self.player_x: float = 250.0

    def process_event(self, event: pygame.event.Event) -> None:
        if event.type == pygame.QUIT:
            self.manager.is_running = False

        if event.type == pygame.KEYDOWN and event.key == pygame.K_w:
            # Check if we're clicking the " w " button.
            # If the condition is met, we change our screen to the
            # "MainMenu" screen from the manager.

            self.manager.change_state("MainMenu")

    def process_update(self, *args: float) -> None:
        dt = args[0]

        self.window.fill(BLUE)

        # Player movement-
        pressed = pygame.key.get_pressed()
        if pressed[pygame.K_a]:
            self.player_x -= speed * dt

        if pressed[pygame.K_d]:
            self.player_x += speed * dt

        pygame.draw.rect(
            self.window,
            "red",
            (
                self.player_x,
                100,
                50,
                50,
            ),
        )

        pygame.display.update()
Finally, we need to add our GameState to our StateManager just like
how we did for our MainMenuState.
state_manager.load_states(MainMenuState, GameState)
There you go! We have made a simple pygame to handle multiple screens via Game State! The final code will look something like this-
import pygame
from game_state import State, StateManager

GREEN = (0, 255, 0)
BLUE = (0, 0, 255)
speed = 200
pygame.init()
pygame.display.init()
pygame.display.set_caption("Game State Example")


class MainMenuState(State, state_name="MainMenu"):
    def process_event(self, event: pygame.event.Event) -> None:
        # This is executed in our our game loop for every event.

        if event.type == pygame.QUIT:
            # We set the state manager's is_running variable to false
            # which stops the game loop from continuing.
            self.manager.is_running = False

        if event.type == pygame.KEYDOWN and event.key == pygame.K_w:
            # Check if we're clicking the " w " button.
            # If the condition is met, we change our screen to the
            # "Game" screen from the manager.

            self.manager.change_state("Game")

    def process_update(self, *args: float) -> None:
        # This is executed in our game loop.

        self.window.fill(GREEN)
        pygame.display.update()


class GameState(State, state_name="Game"):
    def __init__(self) -> None:
        self.player_x: float = 250.0

    def process_event(self, event: pygame.event.Event) -> None:
        if event.type == pygame.QUIT:
            self.manager.is_running = False

        if event.type == pygame.KEYDOWN and event.key == pygame.K_w:
            # Check if we're clicking the " w " button.
            # If the condition is met, we change our screen to the
            # "MainMenu" screen from the manager.

            self.manager.change_state("MainMenu")

    def process_update(self, *args: float) -> None:
        dt = args[0]

        self.window.fill(BLUE)

        # Player movement-
        pressed = pygame.key.get_pressed()
        if pressed[pygame.K_a]:
            self.player_x -= speed * dt

        if pressed[pygame.K_d]:
            self.player_x += speed * dt

        pygame.draw.rect(
            self.window,
            "red",
            (
                self.player_x,
                100,
                50,
                50,
            ),
        )

        pygame.display.update()


def main() -> None:
    screen = pygame.display.set_mode((500, 600))
    # Create a basic 500x600 pixel window

    state_manager = StateManager(screen)
    state_manager.load_states(MainMenuState, GameState)
    # We pass in all the screens that we want to use in our game / app.

    state_manager.change_state("MainMenu")
    # We need to use the name we supplied in the __init_sublcass__'s `state_name`.
    # If no state_name was passed, we use the class name itself.

    clock = pygame.time.Clock()

    assert state_manager.current_state is not None

    while state_manager.is_running:
        # The state manager has a `is_running` attribute which is `True` by default

        dt = clock.tick(60) / 1000
        # The delta time from the clock for frame rate independance.

        for event in pygame.event.get():
            state_manager.current_state.process_event(event)
            # Calling the event function of the running state.

        state_manager.current_state.process_update(dt)
        # Calling the update function of the running state.


if __name__ == "__main__":
    main()
Demo Output
Upon following this guide correctly, you will obtain an output similar to this-
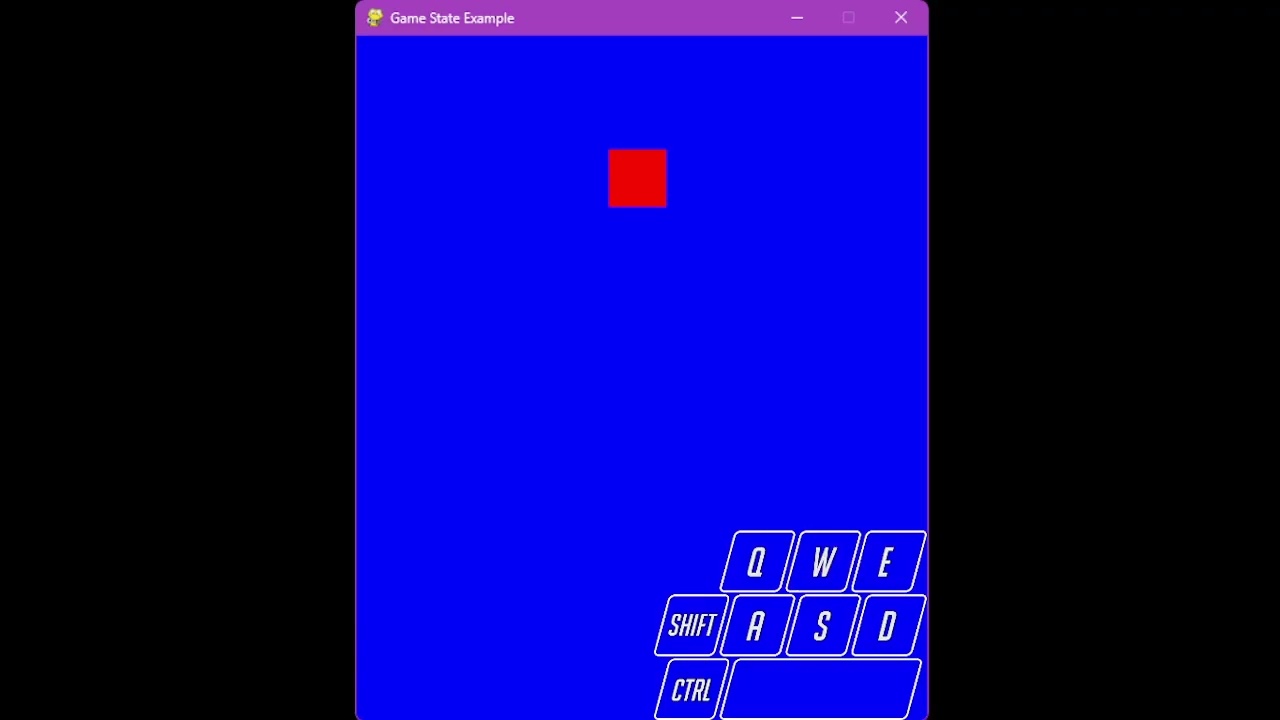
(Click to open the video)
State Hooks
State hooks allow you to dynamically load state files without needing to import them.
Let’s take our previous example and split the MainMenuState and
GameState into separate files and load the file paths instead of importing
their classes.
Let’s structure our project like this-
Our project structure. With game_state_hooks being the root of the project.
game_state_hooks/
    │ - main.py
    │
    └───states/
        │ - game.py
        │ - main_menu.py
Inside our main.py file let’s initialize our pygame and dynamically load
the state files.
main.py file
import pygame
from game_state import StateManager

pygame.init()
pygame.display.init()
pygame.display.set_caption("Game State Hooks Example")


def main() -> None:
    screen = pygame.display.set_mode((500, 600))
    # Create a basic 500x600 pixel window

    state_manager = StateManager(screen)
    state_manager.connect_state_hook("states.main_menu")
    state_manager.connect_state_hook("states.game")
    # Here we pass in the path to the state files.
The state_manager.connect_state_hook method is what calls the hook function
in our state file to load it.
Note that the path must be dot separated like regular Python imports if
accessing a sub-module. e.g. states.game if you want to import
states/game.py.
We can also automate loading our state files by looping through our states/
directory.
main.py file
import pygame
from game_state import StateManager
from pathlib import Path

pygame.init()
pygame.display.init()
pygame.display.set_caption("Game State Hooks Example")


def main() -> None:
    screen = pygame.display.set_mode((500, 600))
    # Create a basic 500x600 pixel window

    state_manager = StateManager(screen)
    STATES_DIR = "states."
    path_obj = Path(STATES_DIR)

    # Use glob to find all files ending with .py
    for file_path in path_obj.glob("*.py"):
        if file_path.is_file():  # Ensure it's a file and not a directory
            state_manager.connect_state_hook(STATES_DIR + file_path)
    # With this, you don't need to manually mention every state file in that directory.
    # Given that, that directory only contains state files to be loaded.
And adding the running mechanism, the final main.py file will look like-
main.py file
import pygame
from game_state import StateManager
from pathlib import Path

pygame.init()
pygame.display.init()
pygame.display.set_caption("Game State Hooks Example")


def main() -> None:
    screen = pygame.display.set_mode((500, 600))
    # Create a basic 500x600 pixel window

    state_manager = StateManager(screen)
    STATES_DIR = "states."
    path_obj = Path(STATES_DIR)

    # Use glob to find all files ending with .py
    for file_path in path_obj.glob("*.py"):
        if file_path.is_file():  # Ensure it's a file and not a directory
            state_manager.connect_state_hook(STATES_DIR + file_path)
    # With this, you don't need to manually mention every state file in that directory.
    # Given that, that directory only contains state files to be loaded.

    state_manager.change_state("MainMenu")
    # We need to use the name we supplied in the __init_sublcass__'s `state_name`.
    # If no state_name was passed, we use the class name itself.

    clock = pygame.time.Clock()

    while state_manager.is_running:
        # The state manager has a `is_running` attribute which is `True` by default

        dt = clock.tick(60) / 1000
        # The delta time from the clock for frame rate independance.

        for event in pygame.event.get():
            state_manager.current_state.process_event(event)
            # Calling the event function of the running state.

        state_manager.current_state.process_update(dt)
        # Calling the update function of the running state.

if __name__ == "__main__":
    main()
Now we need to make a few changes to our state files for it to accept hook loading.
Let’s first take a look at our states/games.py file. It initially looks
like this-
states/games.py file
import pygame
from game_state import State

BLUE = (0, 0, 255)


class GameState(State, state_name="Game"):
    def __init__(self) -> None:
        self.player_x: float = 250.0
        self.speed = 200

    def process_event(self, event: pygame.event.Event) -> None:
        if event.type == pygame.QUIT:
            self.manager.is_running = False

        if event.type == pygame.KEYDOWN and event.key == pygame.K_w:
            # Check if we're clicking the " w " button.
            # If the condition is met, we change our screen to the
            # "MainMenu" screen from the manager.

            self.manager.change_state("MainMenu")

    def process_update(self, *args: float) -> None:
        dt = args[0]

        self.window.fill(BLUE)

        # Player movement-
        pressed = pygame.key.get_pressed()
        if pressed[pygame.K_a]:
            self.player_x -= self.speed * dt

        if pressed[pygame.K_d]:
            self.player_x += self.speed * dt

        pygame.draw.rect(
            self.window,
            "red",
            (
                self.player_x,
                100,
                50,
                50,
            ),
        )

        pygame.display.update()
To add the state hook functionality, all we need to do is create a hook
function in the file which loads the State to the StateManager.
Like this-
states/games.py file
from typing import Any

import pygame
from game_state import State

BLUE = (0, 0, 255)


class GameState(State, state_name="Game"):
    def __init__(self) -> None:
        self.player_x: float = 250.0
        self.speed = 200

    def process_event(self, event: pygame.event.Event) -> None:
        if event.type == pygame.QUIT:
            self.manager.is_running = False

        if event.type == pygame.KEYDOWN and event.key == pygame.K_w:
            # Check if we're clicking the " w " button.
            # If the condition is met, we change our screen to the
            # "MainMenu" screen from the manager.

            self.manager.change_state("MainMenu")

    def process_update(self, *args: float) -> None:
        dt = args[0]

        self.window.fill(BLUE)

        # Player movement-
        pressed = pygame.key.get_pressed()
        if pressed[pygame.K_a]:
            self.player_x -= self.speed * dt

        if pressed[pygame.K_d]:
            self.player_x += self.speed * dt

        pygame.draw.rect(
            self.window,
            "red",
            (
                self.player_x,
                100,
                50,
                50,
            ),
        )

        pygame.display.update()

def hook(**kwargs: Any) -> None:
    # This function should be present below the State you want to load and should call
    # the `StateManager.load_states` method while passing in the State you want to laod
    GameState.manager.load_states(GameState, **kwargs)
Doing the same for states/main_menu.py-
states/games.py file
from typing import Any

import pygame
from game_state import State

GREEN = (0, 255, 0)


class MainMenuState(State, state_name="MainMenu"):
    def process_event(self, event: pygame.event.Event) -> None:
        # This is executed in our our game loop for every event.

        if event.type == pygame.QUIT:
            # We set the state manager's is_running variable to false
            # which stops the game loop from continuing.
            self.manager.is_running = False

        if event.type == pygame.KEYDOWN and event.key == pygame.K_w:
            # Check if we're clicking the " w " button.
            # If the condition is met, we change our screen to the
            # "Game" screen from the manager.

            self.manager.change_state("Game")

    def process_update(self, *args: float) -> None:
        # This is executed in our game loop.

        self.window.fill(GREEN)
        pygame.display.update()


def hook(**kwargs: Any) -> None:
    # This function should be present below the State you want to load and should call
    # the `StateManager.load_states` method while passing in the State you want to laod
    MainMenuState.manager.load_states(MainMenuState, **kwargs)
That’s all you need to do to use state hooks!
Running your main.py file will give you the same output as Demo Output
All the code in this guide is available in the examples directory of it’s repository.